
Are you interested in screen printing? However, you seem lost when it comes to printing on transparency films. No printing guru today can boast of being the best without mentioning their fears when they thought of getting into the business. The good news is that the process is not a complex one and anybody can do it.
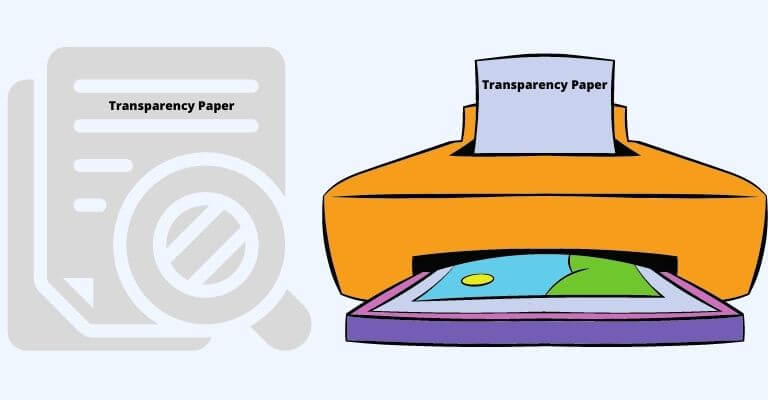
What is a Transparency Paper?
A transparency paper or film is a thin sheet of flexible and translucent material on which you can draw some artwork and then light is introduced to transfer the images to a screen with a photo emulsion coating.
When the light hits the emulsion, it becomes hard, and some sections of the screen remain black as ink spreads. The design remains on the screen, which is later transferred to the fabric.
To make the above explanation clear, we will take you through the entire process of printing on transparency, and eventually, you will join those who call themselves the printing gurus.
The 6 Steps to Print on Transparency Paper for Screen Printing
Step 1# Design Creation & Conversion
After ensuring that the printer is ready, create a design and convert it to black and white. This conversion is necessary because using black and white or grayscale colors will not work. The halftones will only work if the dots are not too small.
Step 2# Check RGB Settings
Use photo editing software to make changes to the images. Open your favorite software and change the RGB settings to 0. Then move the cursor on G, B, and R to 255 once you are one, the images should be ready for printing
Step 3# Resize Your Design If Needed
Log in to your image onto a word editor and resize it based on how big you would like your design to be. Make the image big enough to enable stretching even before pixilation. If the pixels are visible at this stage, then the printout will look good on your fabric.
Step 4# Transparency Papers Sides
Transparency papers have a smooth and slick side while the other side is rough. Ensure that when loading the paper into the printer, the rough side should be the one that is printed on. The smooth part prevents the ink from drying.
If you are unable to get the difference between the two sides immerse one of its corners with water, and the printable side will become sticky.
Step 5# Check Printer Settings
Before printing on the paper, the printer should be able to print its highest Dots Per Inch (DPI). In many cases, you may need to choose “specialty paper” or “transparency paper” as a setting option.
Step 6# After Print Dry It Before Using Again
The moment the transparency paper is printed on, leave it to dry for a few minutes before using it again.
Tips for Making Transparencies Ready for Screen Printing
- All the lines on the artwork must be solid.
- If using your hands to get your artwork designed avoid felt pens or anything that leaves a jagged edge. If you are on a computer avoid working in RGB color mode, try bitmap or grayscale without anti-aliasing.
- You must use dark ink. In most cases, we use black ink to block light. Black is the preferred color of ink regardless of what color of ink you will be using on the screen for the final print.
- All other clear areas in print must be empty.

Advantages of Using A Computer
The best or the easiest way to get transparencies is to use a computer to design the artwork. Here are the advantages of using a computer.
- Make things easy by adjusting the computer and print to varying transparencies.
- You can rely on a computer to keep backups.
- You can store the artwork on different storage media like in the cloud or emails and access them anywhere and anytime.
- Once you have the art file, the only thing left is to print on your film using an inkjet printer and burn it using a light source.
Another content of us: How to do Screen Printing on T-Shirts at Home
Here is are Some Considerations to Make When Working on Your Graphics
- Size
- Type of ink
- Color of ink
- Degree of detail
- Type of fabric to be printed
- The complication of the graphic
- Variation of the degree of detail in the design
Size
Before the graphic can start, remember that different screen printers come with transparency films of different sizes. For example, the Merchmakr kit has an 8.5” X 11” image size, while the Merchmakr system has larger images measuring up to 11” X 11” and offers little room for flexibility. You can push it to 12” X 12”.
Pushing the image size to 12” X 12” will leave you with little room to work with a squeegee, however; the good news is that working with larger images will give excellent results.
- Bigger images mean big transparency papers and printers too.
- Combine some transparency papers as long as you know how to overlap.
- Give the design a title as you print.
Type of ink
Two types of ink available for use in screen-printing are plastisol and water-based inks. We will examine them below:
Plastisol Ink
Plastisol is popular probably because of its ability to stick on screens for long without drying and its opacity level is also commendable. Other factors that have contributed to its popularity are flexibility and durability. Plastisols are sold as bases and additives.

Plastisol is thermoplastic because it is made up of PVC materials through emulsion. The ink does not pass through the fabric and on the same note; it is opaque on colored garments compared to other inks. Plastisol on fabric gives it a plastic feel.
Plastisol ink will not dry until cured with heat reaching 325 degrees Fahrenheit meaning it can remain on the screen and will not run to ruin your work. The ink can be scraped off for re-use in need be.
Although the ink seems to be a perfect choice, there are some disadvantages such as melting when it is exposed to hot surfaces. In such circumstances, the smears will ruin the garment.
Its ability to stabilize even after adding some additives makes it popular among screen printers.
Puff ink: raises the ink from the fabric giving a 3-dimensional look and feel after the curing process.
Glitter ink: made from metallic flakes, the additive adds a sparkle to the effect.
Nylobond: makes it a reality of printing on waterproof surfaces like nylon.
Suede: makes it possible to add a suede touch to your fabric.
Screen printers will warn you against using wooden materials to stir the mix as the wood take off the plasticizer through absorption. Use a stainless steel material instead.
Water-based Ink
Comparing the use of plastisol and water-based ink plastisol may have many advantages but is not as popular as the water-based version. This ink is popular for use in light-colored fabrics and comes in handy when working on large designs and fabrics.
A water-based ink permeates the cloth more deeply and gives your design a much-needed softer touch. The ink cures at 225 degrees Fahrenheit, and it can also be air-dried.
Discharge Ink
This type of ink is also water-based gives a softy design and is only recommended for dark cotton fabrics. The ink has some activation agents and pigments that bleach the garment to its natural fabric color. As the pigments dye the bleached material, the discharge ink cures at 225 degrees Fahrenheit and can be air-dried.
The downside of this ink is that after mixing it has an eight-hour window for use, which presents a wasteful tendency compared to the others. You can only use it in a properly ventilated room, and users must wear gloves to apply it.
If you are in that stage where you need to choose which type of ink to use, most printers recommend plastisol ink. The ink is also good for a DIY enthusiast, as it does not contain dangerous chemicals that can cause harm. Plastisol can remain open for long without drying. Hence, it means you can re-use it.
Color of ink
Every ink pigment has specific characteristics. Light-colored inks tend to be thick than dark ones. The thick ones are more difficult to print, and at times all you need is to move a to lower the mesh screens to make the printing process an easy process.

If you are using transparent or clear ink, you may need an under-base or double print to highlight the design in darker materials. An under-base is an additional layer of white ink or a light-colored ink that other colors being printed can sit on. Its role is to mask the other colors of the garment.
Degree of detail
An image with more details is hard to pull off than bolded images that have thick lines and dots. To make the design process easy, draw a design with thick lines and large fonts because some printers are capable of handling detailed designs and artwork.
If you are not able to get the details quite vividly, you will need more experience in screen-printing on transparency paper.
Type of fabric to be printed
Cotton is the most comfortable fabric to print on, and it will in many cases, be the best choice. Other printers prefer a blend of cotton with other materials such as polyester.
Whatever the choice of fabric you want to use, it is only practical to test the ink for the suitability, and this is more important if you are working with a stubborn garment. Fabrics with no cotton in them will certainly need special inks.

Additives can be of help when you want to change the ink properties by increasing or reducing the opacity. You can add them if you are going to increase the degree of detail an ink can achieve with the design you are working on.
Also read: How to Shrink Polyester – The Best Way
The complication of the graphic
Changing or varying details within the artwork can complicate the printing process making it difficult. A common variation is the “Knock-out text” which defines a field of ink with text in it. If the ink contains thin lines, it could mean trouble.
This variation will even make it difficult to read text when there is a possibility of having solid print between readable texts. A quick solution to this could be filling a second screen with an ink color even when the ink is similar to that of the garment.
Another complication could be the halftones (gradations) problems. Gradation is the use of patterns to make the ink have a light appearance. This is quite common in graphics, grayscale images, and photographs. You can work around graduation by using solid ink colors in graphics and sticking to line art to avoid many inconveniences.
Once the design is getting closer to finish, always use your registered trademark at the center and bottom of the graphics to make proper placement of the transparency films. This can be helpful in your future multi-color imprints.
Variation of the degree of detail in the design
A design with so many features needs to be corrected by adding a little ink to make the artwork look even. Using different screens even when working with a single color could solve all your problems
You will want to avoid printing designs that are spotty by avoiding thin lines and small fields that create a blur effect when heavy ink deposits are present. Having contrasting fields on the same screen could be problematic.
Conclusion
Most printers prefer to print on the transparency films using a mirror image setting. What it means is that printing should be done backward. Do not forget to make the image designs as dark as possible; you can test this on your printer until you get the best dark results.
When buying transparency films, make sure that you only purchase if you are sure it can work with your kind of printer and available ink well. Choose brands that come with instructions on how to set up a basic screen-printing for the chosen machine.
Once the printing is reflected on film, hold it and identify any spots. To become a professional screen-printer run a successful printing company using transparency paper, and invest in an inkjet printer that uses black ink cartridges to help you get the best screen-printing job.


